Every time you interact with a computer, either using a command line or graphically, you are using a console. Despite its ease of use, a console must address and solve a lot of compatibility problems, for example properly interpreting control characters that may differ from terminal to terminal.
Being able to customize settings such as locale and keyboard layout is the basis, but it is not enough: , having at least a basic understanding of how a console works under the hood is certainly a valuable skill that lets you quickly and easily address some uncomfortable situations that sometimes arise, especially when connecting to old systems that, in the face of security best practices, for various reasons after decades are still there without being updated, maybe because very are running obsolete services that are not compatibles with up to date operating systems.
The "Linux Console Essential Virtual Terminals Terminal Emulation and configuring locale" post is meant to provide you everything it is necessary to know to solve the most common problems that may arise concerning the Linux console and locale.
Console and Terminal Emulation
Virtual Consoles are the modern implementation of the Terminal Consoles (sometimes called teletypes) that were attached to the old mainframes.
At the very beginning a Terminal was composed of a device with a very essential keyboard to type input and a printer, later superseded by CRT monitor, to see the output.
These devices were connected to the mainframe via a serial line or, if the connection was remote, via a serial line and modems.
The Terminal itself had no processing capabilities, and is therefore often described as a "dumb" terminal.
A Terminal is made of three layers:
This is the upper layer that simply processes typed characters (one at time). Character devices like a line printer (impact printers, not to be confused with "modern" printers) can read one character at time, whereas character devices like keyboards can write one character at time.
it is a standard to implement control codes. For example line feed (LF) means to add a line, carriage return (CR) means to go to the beginning of the line, CTRL+U sequence deletes the preceding character (backspace), CTRL+C interrupt processing and so on.
the driver to communicate with the underlying hardware or with a software implementation when there's not a direct involved hardware (for example during SSH connections)
The character device interface is called TTY: it is the channel to send input and to receive output and on modern Linux systems equipped with systemd is created beneath "/dev" filesystem at boot time by the systemd-udevd process as soon get notified by the kernel:
We can verify this simply by typing:
ls -al /dev/ttythe output is as follows:
crw-rw-rw-. 1 root tty 5, 0 Apr 8 15:55 /dev/tty
Besides the TTY, there's also a pseudo-TTY character device interface (called Pseudo-Tty-MultipleXer) that is used as master interface when using remote virtual consoles. You can view by typing:
ls -al /dev/ptmx
the output is as follows:
crw-rw-rw-. 1 root tty 5, 2 Apr 10 13:28 /dev/ptmx
As you can see, both these files are owned by the "root" user and by the "tty" group, but POSIX permissions are set so that anyone is able to read and write into it.
The terminal can use the line in two modes:
- "cooked", that involves the use of line discipline
- "raw": in this mode it's up to the application (the terminal or the software in use, such as an editor) to handle control sequence characters.
The standard control set used ASCII values lower than 32 (for example LF is 10), but it became early clear that single character controls were not enough to manage all the required commands that are needed for example to handle flow control.
That's why vendors started to develop proprietary control sets for their own terminals.
The most used Terminal has certainly been the Digital VT/100 / VT220.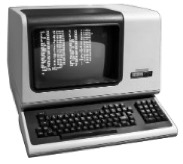
UNIX machines were multi-user machines, and every user had its own terminal, from a different vendor, that supported a different control set. To ease things, a server side terminal emulation layer has been added – this is called terminal emulator: the server can guess the kind of terminal used and so how to interpret control sequences characters by checking the value of "TERM" environment variable. This value is set by the terminal as soon as a connection is established.
Even nowadays we are using terminal emulation: from the perspective of implementing console line controls there's no difference to having a hardware console that connects via a serial line or a Virtual Console (software) that connects via TCP/IP: both kinds of consoles require control characters or sequences over the line.
That's why Virtual Console implementations must provide several terminal emulations: by simply setting your virtual terminal emulator to use one of the terminal emulations known by the remote server you can connect to legacy UNIX systems that may support only a few terminal emulations. It is quite rare having to do this, but it can still happen, and now you know how to deal.
Terminal Emulation Mismatch
A terminal emulation mismatch happens when the terminal you are using announces a terminal emulation different from the one it is actually using, or does not announce it at all, or when for any reason the server does not honor the announced terminal emulation (maybe because the server is too and that specific emulation was not already available).
When this happens the server selects a wrong line discipline, with the consequence of not being able to properly interpret control characters.
Let's see this in action: open your local terminal (Terminal on MAC, X-Term on Linux and so on) and type:
echo ${TERM}the output on a MAC is as follows:
xterm-256color
this means that the MAC terminal is using "xterm-256color" emulation.
Let's connect to a remote host, such as "jump-ci-up3a001.carcano.local":
ssh jump-ci-up3a001.carcano.localonce connected, type again:
echo ${TERM}the output is again as follows:
xterm-256color
this is because when connecting your terminal emulator has announced itself as "xterm-256color".
Now let's logout and come back to the local computer (my MAC in my case) – simply type:
exitTo see in action what happens when there's a terminal emulator mismatch, let's configure a different value for TERM environmental variable, so that the terminal announces itself as if it were using a different terminal emulation ("VT100" in this example):
export TERM=VT100SSH connect again to the remote host:
ssh jump-ci-up3a001.carcano.localand once logged in, type:
echo ${TERM}output this time is:
VT100
as you see the remote server switched to VT100 terminal emulation. So, to summarize, we are connected to a remote server that is using the "VT100" terminal emulation, but our terminal is still configured to use "xterm-256color". This definitely is a terminal emulation mismatch.
Now to type anything you want on the remote shell - for example:
echo Hello wordwait, we made a typo: I meant "world" instead of "word". Let's try to delete the wrong word by pressing the "delete" key of the keyboard ... but it does not work!
That is because our local terminal is sending the "xterm-256color" escape sequence for backspace, but the remote connection has been set up claiming that our terminal is a VT100. Since the remote host interprets the "xterm-256color" backspace control character of the using the "VT100" control characters specifications, this mismatch prevents the characters to be deleted.
Exit back to your computer (type “exit”) and reset the TERM variable to its previous value: in my case I type:
TERM=xterm-256color
You may think that the SSH client exports the TERM variable on the remote host, ... but it is not the actual way it works. The actual value of the terminal emulator to use is directly passed from the client when establishing a pseudo-terminal channel, as per the RFC 4254 § 6.2.
byte      SSH_MSG_CHANNEL_REQUEST
uint32    recipient channel
string    "pty-req"
boolean   want_reply
string    TERM environment variable value (e.g., vt100)
uint32    terminal width, characters (e.g., 80)
uint32    terminal height, rows (e.g., 24)
uint32    terminal width, pixels (e.g., 640)
uint32    terminal height, pixels (e.g., 480)
string    encoded terminal modes
For more information on Pseudo-Terminals, please read the "Remote Virtual Console" paragraph later on.
Terminal Emulation And Applications
As we saw so far, Linux (and of course UNIX) applications run within a terminal: since over the years they have created a lot of (often proprietary) different terminals, programs must know how to interface to them. A very rudimental, but ineffective and unmaintainable way may be to embed into the application itself a library that lets the application select the proper set of sequences and control characters for the terminal in use. Some very old or poorly written applications worked that way. A more scalable solution is certainly to provide a database containing information about every known terminal, and simply have applications leverage on it. This is actually why Termcap, and Terminfo later on popped up.
Termcap
Termcap is the original Unix method of providing terminal information: it consists of just one file with entries describing the various terminals, both in terms of capabilities (for example screen size), of escape sequence assigned to special keys and of the sequences assigned to perform operations such as erasing a line or moving the cursor.
Its default path is often "/etc/termcap", but applications can easily locate it by reading the value of the "TERMCAP" environment variable. The library is so handy that it also allows an application to provide and load its own termcap file if necessary. Despite this is a very rare need, you can of course even customize the termcap file, even the default one - this is often accomplished by copying the settings of the terminal that is closest to your needs, and then completing the missing features.
Terminfo
After some time, Termcap itself has been superseded by terminfo, which contains equivalent termcap capabilities.
Conversely from termcap, the terminfo database is compiled (this of course implies that there must be source files) and it is stored beneath a directory tree with files dedicated to a single terminal type. For example, the terminfo binary file for the "vt100" terminal is called "vt100".
Try locating it as follows:
locate vt100it is often found beneath any of the following directory trees:
- /etc/terminfo
- /usr/lib/terminfo
- /usr/share/terminfo
- ~/.terminfo
these, by the way are the paths scanned by the applications looking form terminfo files, if no "TERMINFO" environment variable is set.
Let's see which RPM package provides terminfo files:
rpm -qf /usr/share/terminfo/v/vs100on my system, the output is:
ncurses-base-6.2-8.20210508.el9.noarchthat is exactly what we would expect: terminfo is loaded using the ncurses library indeed.
You can have a quick look to the settings of the terminal currently in use by running the "infocmp" utility:
infocmpthese are the very first lines of output on my system:
#	Reconstructed via infocmp from file: /usr/share/terminfo/x/xterm-256color
xterm-256color|xterm with 256 colors,
	am, bce, ccc, km, mc5i, mir, msgr, npc, xenl,
	colors#0x100, cols#80, it#8, lines#24, pairs#0x10000,
	acsc=``aaffggiijjkkllmmnnooppqqrrssttuuvvwwxxyyzz{{||}}~~,
	bel=^G, blink=\E[5m, bold=\E[1m, cbt=\E[Z, civis=\E[?25l,
	clear=\E[H\E[2J, cnorm=\E[?12l\E[?25h, cr=\r,
	csr=\E[%i%p1%d;%p2%dr, cub=\E[%p1%dD, cub1=^H,
as you can see, it is guessing capabilities from the "/usr/share/terminfo/x/xterm-256color" file.
If you are connecting from a UNIX-like system using a terminal that is not known by your target host, you can use infocmp to generate a terminfo source for your client terminal, pipe it to a file on the remote host using SSH and compile it using "tic". For example, if your client is using "xterm-256color" terminal emulator:
infocmp -x | ssh host.domain.local 'cat > ~/xterm-256color.ti && tic -x ~/xterm-256color.ti'the outcome is a compiled terminfo file beneath the "~/.terminfo" directory tree:
find ~/.terminfo -type findeed the output is:
/home/mcarcano/.terminfo/x/xterm-256colorIs system administration just about spawning interactive terminal sessions? Successfully debugging terminal emulation mismatches, converting legacy termcap definitions, and managing decoupled multiplexer sessions is a foundational skill for every Linux engineer.
However, manually configuring terminal behaviors and hardening multi-user environment states host-by-host creates an invisible infrastructure drift over time. Modern corporate data centers demand that you abstract these basic OS environments, governing your systems' initialization baselines through robust, cloud-agnostic Ansible blueprints.
If you want to evaluate whether your practical DevSecOps skills are ready to scale past manual shell interventions, jump directly to the Apress Blueprint Box below to discover how to boost and evolve your career using a self-paced learning path.
Tassonomy
There are several terms used when referring to terminals.
Terminals
As already explained, many years ago terminals were connected through serial ports: despite having almost disappeared from PCs, they are still available on some servers and are still broadly used by embedded systems. Serial consoles can be an easy way out to connect to systems that have become unreachable from the network, and sometimes are the last resort to connect to when other user interfaces are unresponsive.
The server side application that enables you to login using the serial interface is called getty, which stands for Get TTy. Most of the modern Linux distributions use a version of getty called "agetty": it is spawned by systemd and connected to a serial port.
Since systems can have more than just a serial port, instead of creating a systemd service unit for each serial port, everything is managed using a service template provided by the "systems/usr/lib/systemd/system/serial-getty@.service" file.
Its contents are as follows:
[Unit]
Description=Serial Getty on %I
Documentation=man:agetty(8) man:systemd-getty-generator(8)
Documentation=http://0pointer.de/blog/projects/serial-console.html
BindsTo=dev-%i.device
After=dev-%i.device systemd-user-sessions.service plymouth-quit-wait.service getty-pre.target
After=rc-local.service

Before=getty.target
IgnoreOnIsolate=yes

Conflicts=rescue.service
Before=rescue.service

[Service]
ExecStart=-/sbin/agetty -o '-p -- \\u' --keep-baud 115200,57600,38400,9600 - $TERM
Type=idle
Restart=always
UtmpIdentifier=%I
StandardInput=tty
StandardOutput=tty
TTYPath=/dev/%I
TTYReset=yes
TTYVHangup=yes
IgnoreSIGPIPE=no
SendSIGHUP=yes

[Install]
WantedBy=getty.targetIt is already properly configured for the most common use cases.
Remember that the list of available consoles is stored by the kernel within the "/sys/class/tty/console/active" file: systemd guesses the serial console to activate from this file - if more entries are found, it picks up the first one. Mind that if necessary the console can be overriden at boot time by passing the kernel parameter "console=", for example: "console=ttyS0".
In some situations this automatic guessing may not be suitable: in this case you can manually enable the serial console you want to enable.
For example, to enable /dev/ttyS1":
systemctl enable serial-getty@ttyS1.service
systemctl start serial-getty@ttyS1.service
You may need to modify settings only for a specific port: in this case just copy the service template into a service unit file dedicated to the specific port. For example, if the port is "/dev/ttyS3":
cp /usr/lib/systemd/system/serial-getty@.service /etc/systemd/system/serial-getty@ttyS3.servicemodify the "/etc/systemd/system/serial-getty@ttyS3.service" systemd unit as needed - for example set the baud rate, then set it as required by the target:
ln -s /etc/systemd/system/serial-getty@ttyS3.service /etc/systemd/system/getty.target.wants/finally reload the configuration of systemd as follows:
systemctl daemon-reloadVirtual Terminals (VT)
The Linux Console
As we said, when you are sitting in front of a server typing commands on the local attached keyboard, and the server is booted in text mode you are actually connected to a console. That console is the so-called "Linux console": a system console developed inside the linux kernel itself and running in the VT subsystem. This means that the console runs in kernel space by the way, in contrast to the terminal emulator, which instead is a user space process that emulates a terminal.
The Linux console supports Virtual Consoles, often called Virtual Terminals (VT): the Linux Kernel provides up to 63 Virtual Terminals and maps them to "/dev/tty*" special device files (/dev/tty1 - /dev/tty63).
To have a closer look to all of this, jus SSH connect to a server that you are sure nobody is locally connected to and type:
ls -al /dev/tty*the output is as follows:
crw-rw-rw-. 1 root tty     5,  0 Apr  8 15:55 /dev/tty
crw--w----. 1 root tty     4,  0 Apr  8 15:55 /dev/tty0
crw--w----. 1 root tty     4,  1 Apr  8 16:42 /dev/tty1
crw--w----. 1 root tty     4, 10 Apr  8 15:55 /dev/tty10
...
please note that all the above files are automatically generated by the "systemd-udev" utility.
Mind anyway that most distributions initialise only the first 7 VT. These terminals are actually logically separated consoles, but sharing the same keyboard and display; despite these shared devices, virtual consoles have their own text buffer, enabling different console programs to run simultaneously, while interacting with the user in different contexts. In addition to that, they can also be a little bit customized: for example each virtual console can even have its own character set and keyboard layout. From the user's perspective, it is the same as working with several independent consoles.
You can switch between Virtual Consoles by pressing the "ALT" and a function key, such as "ALT+F1", "ALT+F2" and so on. On Linux most of the time the default console is the one you can switch by pressing "ALT+F1", and you can use up to six local Virtual Console ("ALT+F1" … "ALT+F6"): the 7th Virtual Console was generally reserved to X-Windows (so is the graphical console), but is enabled only if the system was started at level 5 (graphical mode).
When you connect to a local Virtual Console, the the "/usr/lib/systemd/system/getty@.service" systemd unit connects the virtual console you are using to the first unused "tty" file of the above list.
For example, before logging in, from the console (the physical keyboard and monitor), switch to the second virtual terminal ("ALT+F2"): the agetty process is immediately spawned and attached to "/dev/tty2": you can verify this using the SSH connection we previously opened and typing:
ps a | grep [a]gettythe output is as follows:
   1024 tty1     Ss+    0:00 /sbin/agetty -o -p -- \u --noclear - linux
   1769 tty2     Ss+    0:00 /sbin/agetty -o -p -- \u --noclear - linux
Now, on the local console (not SSH) login to the system using username and password - in this example I'm logged in as "mcarcano" user.
After logging-in, type again the following statement:
ls -al /dev/tty*the output is as follows:
crw-rw-rw-. 1 root     tty     5,  0 Apr  8 16:55 /dev/tty
crw--w----. 1 root     tty     4,  0 Apr  8 16:55 /dev/tty0
crw--w----. 1 mcarcano tty     4,  1 Apr  8 16:56 /dev/tty1
crw--w----. 1 root     tty     4, 10 Apr  8 16:55 /dev/tty10
...
as you see by the file owner, it is clear that "mcarcano" has been attached to the first local Virtual Console
You can of course modify the default settings: since Red Hat 7 and above, this configuration is managed by the "/etc/systemd/logind.conf" file. The number of TTY that can be automatically attached by systemd login is the value of "NAutoVTs" (defaults to 6). You can even reserve a TTY so that other processes cannot attach to it, just to be sure that you can always have a text console: set the TTY number you want to reserve as the value of the "ReserveVT" parameter.
For example, to
- allow up to 8 text console
- be sure that you can always login on console 5
modify the "/etc/systemd/logind.conf" file as follows:
[Login]
NAutoVTs=8
ReserveVT=5
The X-Window Server
Virtual Terminal are also used by the X-Window server (often called also X11): the X-Window is a service providing a protocol for bitmap displays, and is made of
- the X-Server (Xorg), that handles the GUI and requires access to the drivers of keyboard, mouse and of course display
- the X-Client, that is used by every application that needs to use the GUI service provided by the X-Server
- the X-Protocol, used by both parties to communicate
An X-Server instance needs a dedicated VT: the old default on most distributions was to pick up the 7th VT, but recent distributions are configured so to have it bound to the 1st VT.
The X-Server is just an application running inside a VT: this means that you can switch to any other VT, but since the "ALT+Fn" shortcut is used by the X-Server itself, you need to also press the "CTRL" key, so the sequence to use becomes "CTRL+ALT+Fn". The "CTRL" key is only needed when you are in the VT where there's the X-Server running: on the other VT the sequence is still the "ALT+Fn".
Emulated Terminals - Pseudo-TTY
A TTY is somehow bound to specific hardware and its device driver (serial, PS/2, USB and so on) but mind that when you connect to a server from remote you are not using a pure-software system: more specifically, this means that when connecting from remote, for example using SSH, you are not using a "pure" TTY, but a "pseudo" TTY.
Are you enjoying these high quality free contents on a blog without annoying banners? I like doing this for free, but I also have costs so, if you like these contents and you want to help keeping this website free as it is now, please put your tip in the cup below:
Even a small contribution is always welcome!
Pseudo TTY are managed by a special device file (usually "/dev/ptmx") - you can view details on it as follows:
ls /dev/ptmx -lthe output is as follows:
crw-rw-rw-. 1 root tty 5, 2 Apr 8 16:33 /dev/ptmx
The"/dev/ptmx" special device file acts as a multiplexer to which it is possible to attach as a slave device the special device file that represents your pseudo TTY (it is created on the fly at connect time).
On modern implementations, the special device file of the pseudo TTY is created and stored beneath the "devpts" pseudo-filesystem: you can view this filesystem as follows:
mount |grep devptson my system, the output is:
devpts on /dev/pts type devpts (rw,nosuid,noexec,relatime,seclabel,gid=5,mode=620,ptmxmode=000)
let's see the list of pseudo TTY special device files:
ls -l /dev/ptson my system, the output is:
crw--w----. 1 mcarcano tty  136, 0 Apr  8 16:24 0
c---------. 1 root    root   5, 2 Apr  8 15:55 ptmx
as you see, there's a file with name "0" owned by the "mcarcano" user and by the "tty" group. This means that there must be a "mcarcano" user connected to the pseudo-tty 0. We can easily verify this as follows:
whoindeed the output is:
foo            tty1         Apr  8 16:22
mcarcano       pts/0        Apr  8 16:24 (10.0.2.2)
"pts/0" refers to the special device file "/dev/pts/0".
X-Window Terminals (xterm, Konsole, gnome-terminal and such)
Pseudo-TTY are also exploited when working with X-Window based terminals (xterm, Konsole, gnome-terminal, ...) - the terminal app is an X-Window client indeed, and so it is a remote application by the point of view of the X-Server, despite you maybe are running both of them on the same system. The terminal application attach to the PTY master and launches a shell (for example the BASH), connecting it to a PTY slave (for example "/dev/pts/1"): this means that stdin, stdout and stderr of that shell go to that PTY slave.
On any kind of terminal - Physical, Virtual or Emulated - you can always easily guess the TTY used by the running shell by typing:
ttyEmulated Terminal Managers (Screen and TMUX)
You certainly know that when you disconnect every child process of your session is killed: this means that even if you send a command to run in the background that command gets killed when you disconnect. You probably know that you can prepend "nohup" to a statement to prevent this to happen, so that the task does not get killed, but what about if you need to run a set of statements that contains some long running commands? Nohup is not a feasible option, since it does not allow you to resume the closed session.
This is exactly the scenario for using an Emulated Terminal manager, such as the "screen" or "tmux" applications: just run the "screen" (or "tmux") command and then create a new session within it.
It will take care of:
- creating a new Emulated Terminal process
- allocating a new PTY dedicated to it
- spawning a shell
This Emulated Terminal process does not get killed when the Terminal Emulator you used to launch "screen" (or "tmux") gets disconnected: this means that you can reconnect to a screen session previously launched at any moment, and resume your work continuing from the last completed command.
Setting System Locale And Keyboard Layout
On recent Linux distributions, system locale and keyboard layout information can be displayed in a whole by typing:
localectl statuson my system the output is:
   System Locale: LANG=en_US.UTF-8
       VC Keymap: us
      X11 Layout: us
Locale is a set of environmental variables that configure locality specific settings, such as the language, the country, the character encoding and any other special variant preferences your applications and shell session may need to know. These environmental variables are also used by system libraries and any locale-aware applications on the system.
You can easily dump all locale related variables as follows:
localethe output on my system is:
LANG=en_US.utf8
LC_CTYPE="en_US.utf8"
LC_NUMERIC="en_US.utf8"
LC_TIME="en_US.utf8"
LC_COLLATE="en_US.utf8"
LC_MONETARY="en_US.utf8"
LC_MESSAGES="en_US.utf8"
LC_PAPER="en_US.utf8"
LC_NAME="en_US.utf8"
LC_ADDRESS="en_US.utf8"
LC_TELEPHONE="en_US.utf8"
LC_MEASUREMENT="en_US.utf8"
LC_IDENTIFICATION="en_US.utf8"
LC_ALL=
as you see my system is configured with the "en_US.utf8" locale.
These settings are all derived from the setting of the "LANG" environment variable in the "/etc/locale.conf" file, that defines the system-wide locale.
If you want to change it system-wide, you can either directly edit that file, or run "localectl set-locale LANG=" with the value of the locale you want to set.
For example, to set locale to "it_CH.UTF-8", type (mind that it is a permanent change):
sudo localectl set-locale LANG=it_CH.UTF-8the setting is available since the next login, but you can of course source the "/etc/locale.conf" file to immediately apply it.
of course, in order to know exactly what value to type, you need to get a list of all the available values: you can get it as follows:
localectl list-localesthis is a snippet of the output on my system:
C.UTF-8
aa_DJ.UTF-8
aa_ER.UTF-8
aa_ER.UTF-8@saaho
aa_ET.UTF-8
af_ZA.UTF-8
agr_PE.UTF-8
ak_GH.UTF-8
As previously said, several locale-aware applications and libraries use the locale variables.
This implies that in order to write portable scripts, inside the scripts, it is always wise to temporarily reset all of them to a known standard state.
The most convenient value is "C", that is the good legacy ANSI_C locale.
So a portable script must always have the following statement at its very beginning:
export LANG=Cas for the keyboard layout, it can be configured using the "set-keymap" option of the "localectl" command line utility. For example, to set the "ch" keyboard layout type:
sudo localectl set-keymap chif necessary, you can also set a different keyboard layout for the X-Windows system only by using the "--noconvert set-x11-keymap" option of the "localectl" command. For example:
sudo localectl --noconvert set-x11-keymap ch-de_macof course you need to get a list of all the available keymaps first. To display it, just type:
localectl list-keymapsthis is a snippet of the output on my system:
al
al-plisi
at
at-mac
at-nodeadkeys
az
ba
ba-alternatequotes
ba-unicode
Beyond Terminal Emulators: Building the DevOps and DevSecOps Foundations
Successfully fine-tuning local line disciplines, overstepping hardware switching limits via virtual consoles, and enforcing consistent system-wide locale mappings are essential building blocks for clean operations. Yet, managing local console abstractions represents just one single brick in the massive wall of modern DevOps and DevSecOps engineering on Linux. In complex enterprise networks, an expert must look past raw terminal access: you need to possess the deep practical engineering required to bind core system configurations with low-level kernel defenses, automated package compliance, secure container delivery, and native cloud CD pipelines without vendor lock-in
When you look closely at your daily infrastructure deployment and design tasks, are you fully confident you master the holistic engineering layer running under the hood of your automation nodes? Or are you simply connecting separate open-source tools via emulated shells without a comprehensive architectural blueprint?
My book, "DevSecOps and DevOps for Linux: The Foundations", published by Apress, was written specifically to drive this professional reflection. It is a comprehensive, lab-driven blueprint tailored for both students and experienced engineers to systematically identify and eliminate their technical gaps. Through intensive, hands-on enterprise exercises built entirely on open-source, cloud-agnostic architectures, you will discover how to turn solid host-management capabilities into secure, automated, and scalable deployment frameworks hosted natively on enterprise Kubernetes.
Key insights covered in this volume:
- The Holistic Skills Set Brick: Bridge technical engineering with team management frameworks. Master
Scrum,Kanban, andLeanmethodologies to design system architectures aligned with real corporate workflows. - The Shell Scripting & Unix Tools Brick: Build rigorous operational foundations. Master advanced
Bashshell scripting architecture while learning how to combine core Unix tools into robust, repeatable, and enterprise-ready host automations. - The Version Control Engineering Brick: Move past basic commits. Dive deep into
Gitversion control, mastering feature-branch workflows, repository lifecycle management, and complex conflict resolution. - The Data & Core Automation Brick: Build bulletproof data processing setups. Learn advanced
RegEx, how to operate using evergreen tools such asGrep,Sed, andAWK, and how to master structured data parsing (XML,JSON,YAML) usingPythonand tools likexmlstarlet,jq, andyq. - The Modern Python & Automation Brick: Develop a modern Python project using
pyproject.tomlwithpytest-based unit tests, governing the project withGNU Makefor testing, building, and digitally signingRPMpackages. The project is presented in an evolving fashion, showing how features are added step by step, highlighting how a properly structured Python project can be improved and evolved with minimal or no rework at all. - The Linux OS Hardening & PKI Brick: Learn the real mechanics of security. Implement
X.509/PKIarchitectures,TLSconfigurations, andGPGencryption and signing, while mastering low-level kernel defenses likeSELinuxandLinux Capabilities. - The Compliance Check and Shift-Left Security Brick: Learn how to leverage the
pre-commitframework to automate compliance checks withPylintandFlake8, and perform security scans withBanditandSafety, extending the security audit to the full software supply chain. - The Application Integration Brick: Master the foundational protocols used to securely interconnect enterprise microservices, including
HTTP,REST,OpenAPI,SOAP, andLDAP/LDAPS. - The Infrastructure Delivery Brick: Put theory into practice with vertical, real-world labs. Move from basic scripts to engineering
Ansiblearchitectures, rootlessPodmansetups, image creation viaBuildah, and completePulp3deployments usingDocker Compose. - The Enterprise GitOps Pipeline Brick: Tie everything together by automating your software supply chain. Build complete continuous deployment workflows using
Gitea CIpipelines hosted natively onKubernetes(RKE2).
Footnotes
Here it ends this post dedicated to console and terminal emulation. Of course there are a lot more things we could say if you really want to deep dive, but I am limited to talking about the things that are really worth the effort to know so as to be able to quickly solve problems that are likely to arise sooner or later, especially when dealing with old systems. I owe a special thanks to Pedro, since with his comment he encouraged me into elaborating more the initial post.
In the next post we'll thoroughly talk about SSH, SCP and SFTP, as usual avoiding talking about trivial things, but focusing only on topics that are worth the effort to know to survive weird situations that may arise.

Pedro says:
Hi Marco
Nice post.
A couple of addons.
Termcap & terminfo.
Teminfo System V based, termcap BSD based.
They have the escape sequences for every terminal.
env var TERM is not automagically put in env, if you trust it with all the spagetti shell scripts before the prompt you can get it wrong.
So what I do is prompt for TERM in login shells in ksh .profile or bash .bash_profile
You can test set -o for interactive shell but in my case I prefer a simple isatty.c
#include
int
main()
{
if (isatty(STDIN_FILENO) && isatty(STDOUT_FILENO) && isatty(STDERR_FILENO))
return 0 ;
else
return 1 ;
}
And then in ksh .profile or .bash_profile.
Or xterms inheriting form .xsession
$HOME/isatty
if [ $? = 0 ]
then
print “START SESS TERMINAL `tty` FROM `hostname` `date`”
eval $(tset -s -r -k -m ‘?linux’)
fi
eval puts the result on env var TERM on the shell itself
$TERM is used by vi and other windowing editors so you can edit and move.
If you get it wrong can even be difficult to get out of vi.
You sometimes get the terminal i/o misconfigured when you pass wrong escape sequences for
the $TERM you have. Try cat some binary and see what might happen.
tty sane does not do anything since it works on tty line discipline wich is a diferent matter
Try tput reset or simply reset.
I runs sane escape sequences from terminfo associated with the terminal emulator that is on $TERM
Pseudo terminals.
Their historical origin came from the need for virtual terminal emulator for X windows xterm.
Began on System V via streams.
They are assigned on demand for xterm windows and remote logins via telnet or ssh.
And even on non interactive shells like non interactive ssh.
The shells and windowing editors will have to capture SIGWINCH so they can resize the window.
Pseudo terminals dynamic allocation are a problem for /etc/securetty.
Move /etc/securetty out of the way, add sh/login line to the file, or just live with it.