YAML is a must-have skill for IT professionals, since it is probably becoming the the most commonly used document format for manifest and configuration files - think for example to Kubernetes, Ansible and a lot of other modern Dev-Ops oriented or CI/CD tools such as drone.
Being skilled on YAML does not only mean being able to write YAML documents, but also efficiently query and manipulate YAML files.
This post provides everything it is very likely you must know to exploit YAML in your daily work, explaining its syntax and showing things in action by using yq - a tool we can consider "the jq for YAML", and using Python with PyYAML.
By the way, this post is part of a trilogy of posts dedicated to markup and serialization formats, so be sure not to miss
What is YAML
It stands for Yet Another Markup Language and it is a Unicode based human-readable data-serialization language. Its very compact and readable notation, along with DRY features such as anchors and aliases make it the ideal format to write configuration files and manifests. For this reason this format has become the default format used by Kubernetes, Ansible and a lot of other popular Dev-Ops tools.
The nesting of its data structures relies on indentation (same way as Python does): the use of indentation enables YAML to be read and written in streams - chunks of consecutive YAML lines that are well-formed YAML documents themselves. This saves parsers from having to process a whole YAML document when dealing to extract a specific part of it, avoiding loading everything into memory. This means that you can also parse very large YAML files without actually having to fully load them in memory.

Since YAML nesting relies on correctly indenting things, it is quite easy to make mistakes: a handy tool that can help you to validate YAML documents and find syntax errors is yamllint.
We can install it as follows:
sudo dnf -y install yamllint
we can use this tool to validate YAML file as follows:
yamllint myfile.yml
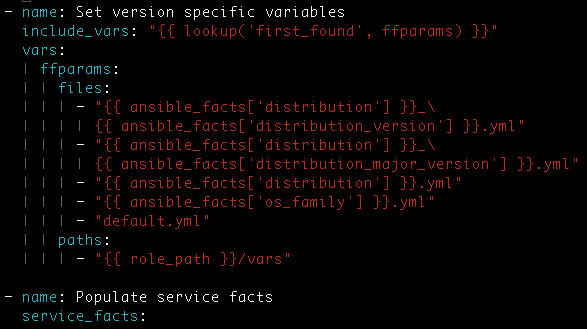
Ansible heavily relies on YAML files: we can get some YAML files to play with by installing the rhel-system-roles RPM package:
sudo dnf install -y rhel-system-rolesThis package provides stock Ansible roles you can use to manage Red Hat based systems, installing them beneath the "/usr/share/ansible/roles" directory.
Using VIM with YAML
If you are ancient like me, you certainly cannot work without the old fashioned vim, ... so here is a list of plugins you cannot miss to work with YAML:
let's install them using vim-plug plugin manager: let's download it as follows:
curl -fLo ~/.vim/autoload/plug.vim --create-dirs https://raw.githubusercontent.com/junegunn/vim-plug/master/plug.vimnow let's modify our "~/.vimrc" file adding the following snippet:
call plug#begin()
Plug 'https://github.com/stephpy/vim-yaml'
Plug 'https://github.com/Yggdroot/indentLine'
call plug#end()
and launch vim as usual:
vimwhile in command mode, enter the command to install the plugins we listed into "~/.vimrc":
:PlugInstallif everything went well we can verify the status of the plugins as follows:
:PlugStatuswe can now configure vim to ease our life with YAML file: configure our "~/.vimrc":
au! BufNewFile,BufReadPost *.{yaml,yml} set filetype=yaml
autocmd FileType yaml setlocal ts=2 sts=2 sw=2 expandtab
we simply define the "yaml" file type and bind ".yaml" and ".yml" files to it. Then we configure some help with indentation - YAML does not allow tabs, and the suggested indents are multiples of two spaces.
Once installed indentLine plugin, we can modify the indentation character used by Indentation guides displaying a thinner line: add the following line to our "~/.vimrc":
let g:indentLine_char = '|'
let g:indentLine_color_term = 239
This is the final outcome when editing a YAML file:
it's much more readable and usable, isn't it?
YQ - an overview
It is a really handy command line tool to manage YAML documents in shell scripts - you can consider it "the jq for YAML".
There are two different projects called yq:
The last one seems to be the more broadly used, probably because the first one is not 100% jq compatible. In this post we see how to use the last one.
It is not a native tool to manage YAML objects: it is much more a format converter from YAML to JSON that, right after converting the object, executes jq. This means that it requires installing jq.
Let's begin by installing yq requirements:
sudo dnf -y install jq python3-pip
we can now install yq using pip as follows:
sudo pip3 install yq
sudo bash -c "cat << \EOF > /etc/profile.d/aliases.sh
alias yq='/usr/local/bin/yq'
EOF"
Let's test it to see what the step "Enable phc2sys" of the timesync Ansible role does: the role is installed into "/usr/share/ansible/roles/rhel-system-roles.timesync" directory, and tasks are declared into the "tasks/main.yml" file.
We can simply cat the file and pipe it to yq, passing the same syntax we would use with jq as argument:
cat /usr/share/ansible/roles/rhel-system-roles.timesync/tasks/main.yml | yq -y '. | to_entries[] |select(.value.name=="Enable phc2sys") | .value'the output streams are:
name: Enable phc2sys
service:
    name: phc2sys
    state: started
    enabled: true
when:
    - timesync_mode == 2
    - timesync_mode2_hwts
as you can see, the nice thing is that you are not required to learn anything more than you already know to use jq, … besides remembering to supply the -y command option when you want to get the output converted from JSON back to YAML format.
YAML Serialization
YAML serialization is quite huge: here we focus only on the things that you are most likely to hit in the daily work. YAML is used to store key-value pairs where the key is called node.
There are only three kind of nodes:
- scalar, that is an opaque datum that can be presented as a series of zero or more Unicode characters
- sequence, that is an ordered series of zero or more nodes; in particular, a sequence may contain the same node more than once. It could even contain itself
- mapping, that is an unordered set of key/value node pairs, with the restriction that each of the keys is unique. YAML places no further restrictions on the nodes. In particular, keys may be arbitrary nodes, the same node may be used as the value of several key/value pairs and a mapping could even contain itself as a key or a value
TAGS
A Tag is a simple identifier used to represent type information of native data structures. There do exist:
- local tags, that are specific to a single application, and start with the "!" character - for example "!TomcatInstance"
- global tags, that are unique across all applications - they are actually URI that make use of the "tag:" scheme and use URI character escaping - for example "!<tag:yaml.org,2002:str>"
Note that when dealing with global tags it is most used the "!!" shorthand - for example:
- !!str is the shorthand of !<tag:yaml.org,2002:str>
- !!map is the shorthand of !<tag:yaml.org,2002:seq>
- !!seq is the shorthand of !<tag:yaml.org,2002:map>
Please note that YAML provides also a "TAG" directive to make tag notation less verbose.
YAML tags are used to associate meta information with each node. In particular, each tag must specify the expected node kind (scalar, sequence or mapping).
Versions And Schemas
The YAML specifications are available on the official website - the current release at the time of writing this post is 1.2.0 - by the way, this release was published with the claimed purpose of bringing YAML "into compliance with JSON as an official subset".
Since a processor often implements a specific version of YAML, you must pay very careful attention to be compliant to the version implemented by your processor, or try to write the YAML code in the most portable manner possible.
Version 1.2, besides adding support to UTF-32, introduces the concept of "Schema": a schema basically is the connection between Tags in the YAML document and Classes / data types in the programming language.
It provides three different schemas:
For example, these are the tags defined in YAML 1.2 Specifications JSON Schema:
- !!str
- !!map
- !!seq
- !!null A null value. Match: null
- !!bool Boolean. Match: true | false
- !!int Integer. Match: 0 | -? [1-9] [0-9]*
- !!float Float. Match: -? ( 0 | [1-9] [0-9]* ) ( \. [0-9]* )? ( [eE] [-+]? [0-9]+ )?
If you do not have special needs, such as the extra types provided by the Core schema, you can simply follow the YAML 1.2 JSON Schema: this way your YAML code should work for most YAML 1.1/1.2 processors. Be wary that 1.1 specifications support only UTF-8 and UTF-16 and anyway the recommended output encoding is UTF-8.
In the following paragraphs I'm describing the serialization 1.2 JSON Schema compliant.
Document separator
You can have multiple documents within a single file by separating them using three hyphens ("---"). Please note that three dots ("...") mark the end of a document without starting a new one.
Comments
Comment lines begin with the Octothorpe (also called "hash", "sharp", or "number sign" - "#"), and anyway anything after the "#" character is a comment:
# This is a YAML comment
foo: bar # This is also a YAML comment
null value
The "null" word identifies the null value
my_undefined: nullNumbers and booleans
Numbers and booleans values must not be enclosed by quotes.
Let's see some examples:
toggle: true
fixed: 42.88
exponential: 0.42e+3
sexagesimal: 190:20:30.15
negative infinity: -.inf
not a number: .nan
booleans values can be either true or false.
Strings
Strings do not normally require quotation marks, although you are free to enclose them in either double or single quotes.
msg: this is a string
msg: 'this is another string'
msg: "this is yet another a string"
msg: "42"
Note however that sometimes quoting the string is mandatory. For example:
- if the string contains a colon (:) followed by a space character
- if the string begins with an opening curly brace "{" or square bracket "[", since they are used in the flow-style notation to enumerate list items or maps
- if the string is a literal such as true or false: the risk is to get the string mapped to a different type, such as booleans.
Just to provide a real life example, Ansible uses curly braces to enable JINJA2 template engine, so the right syntax of a string that contains only an Ansible variable is:
msg: "{{ variable }}"Multiline strings
There are two ways to handle multi-line strings:
if you want to preserve newlines, then use the vertical bar (|) - for example:
preserve_newlines: |
  Carcano SA
  piazza indipendenza, 123
  Lugano, 6900
  CH
if instead you want to fold newlines (have newlines converted into spaces), use the greater-than (>) character - for example:
fold_newlines: >
  Marco Antonio
  Carcano
Get elements using yq
Get elements from a YAML document is pretty simple - consider the following example:
status: "WARN"
message: "Free disk space too low"
threshold: "10%"
let's pretty-print it:
RESULT='status: "WARN"\nmessage: "Free disk space too low"\nthreshold: "10%"'
echo -e $RESULT | yq
the output is:
{
    "status": "WARN",
    "message": "Free disk space too low",
    "threshold": "10%"
}
Let's get only the "threshold" value:
echo -e $RESULT | yq '.threshold'the output is:
"10%"This tutorial is a direct excerpt from my Apress book
Mastering flow-style notations, block mappings, and document separator contexts is an essential milestone for every engineer. However, writing manual text manifests line-by-line is just one single brick in the DevSecOps wall.
Real-world enterprise environments require you to seamlessly scale these structural data layers into automated continuous deployment pipelines, structured Python project governance, and secure cloud-native environments.
If you want to systematically evaluate your technical stack and fill your knowledge gaps, jump directly to the Apress Blueprint Box below to discover how to boost and evolve your career using a self-paced learning path.
Lists
The syntax that must be used to declare a list (a sequence in YAML terms) is depicted by the following snippet:
servers:
    - servera
    - serverb
    - serverc
Please note that lists also have an inline block format (flow-style, sometimes called compact) enclosed by square braces as depicted by the following snippet:
servers: [ 'servera', 'serverb', 'serverc' ]Dictionaries
The syntax that must be used to declare a dictionary (a map in YAML term) is depicted by the following snippet:
vars:
    package_name: apache
    service_name: httpd
    port: 80
Please note that dictionaries also have an inline block format (flow-style, sometimes called compact) enclosed by curly braces as depicted by the following snippet:
vars: { package_name: apache, service_name: httpd, port: 80 }List of Dictionaries
We can of course have list of dictionaries: the syntax is as depicted by the following snippet:
packages:
    - name: apache
      service: httpd
      port: 80
    - name: tomcat
      service: tomcat
      port: 8080
Don't Repeat Yourself (DRY)
The Don't Repeat Yourself - aka DRY - approach requires avoiding to use duplicates: repeating the same thing makes maintaining things hard and error prone indeed.
YAML provides a few handy features to achieve this: anchors, aliases and the Merge Key Language-Independent type.
Anchors and Aliases
They are a feature of YAML that lets you accomplish the task of avoiding repetitions in the document.
- The '&' character marks an anchor, that roughly put is a marker of a chunk of configuration
- The '*' character marks an aliases, that is a placeholder that is expanded using the contents of the anchor it refers to
Let's see both of them in action with this example snippet of an Ansible playbook - create the "anchors.yml" file with the following contents:
---
- name: Update Tomcat Application Servers
  hosts: apps-ci-up3a
  vars:
    tomcat:
      options: &tomcat_opts
        opts: '-Xms1G -Xmx2G'
        catalina_home: /opt/tomcat
    instance01:
      options:
        *tomcat_opts
    instance02:
      options:
        opts: '-Xms2G -Xmx2G'
        catalina_home: /opt/tomcat-02
as you can see:
- at line 6 we define the &tomcat_opts anchor with lines 7 and 8 as contents
- at line 11 we use the *tomcat_opts alias to refer to the contents of the &tomcat_opts anchor
so "instance01" uses the defaults defined by &tomcat_opts anchor, whereas "instance02" uses explicitly defined values.
Let's have yq parsing it to see what happens:
cat anchors.yml | yq -y .the output is as follows:
- name: Update Tomcat Application Servers
  hosts: apps-ci-up3a
  vars:
    tomcat:
      options:
        opts: -Xms1G -Xmx2G
        catalina_home: /opt/tomcat
    instance01:
      options:
        opts: -Xms1G -Xmx2G
        catalina_home: /opt/tomcat
    instance02:
      options:
        opts: -Xms2G -Xmx2G
        catalina_home: /opt/tomcat-02
yq as expected expands the alias with the contents of the related anchor.
But what does it happen if we try to do an override too, for example explicitly setting a different home to "instance01" like in the following snippet?
---
- name: Update Tomcat Application Servers
  hosts: apps-ci-up3a
  vars:
    tomcat:
      options: &tomcat_opts
        opts: '-Xms1G -Xmx2G'
        catalina_home: /opt/tomcat
    instance01:
      options:
        *tomcat_opts
        catalina_home: /opt/tomcat-01
    instance02:
      options:
        opts: '-Xms2G -Xmx2G'
        catalina_home: /opt/tomcat-02
let's try to parse it with yq:
cat anchors.yml | yq -y .this time we have the following error:
yq: Error running jq: ParserError: while parsing a block mapping
  in "", line 10, column 7
expected , but found ''
  in "", line 12, column 9.
so we cannot make overrides when using aliases, ... at least not with the above syntax.
Overrides
Overrides require the alias to be preceded by <<: - create the file "overrides.yml" with the following contents:
---
- name: Update Tomcat Application Servers
  hosts: apps-ci-up3a
  vars:
    defaults:
      options: &tomcat_opts
        opts: '-Xms1G -Xmx2G'
        catalina_home: /opt/tomcat
    tomcat01:
      options:
        <<: *tomcat_opts
        catalina_base: /opt/tomcat/instance-01
    tomcat02:
      options:
        <<: *tomcat_opts
        opts: '-Xms2G -Xmx2G'
        catalina_base: /opt/tomcat/instance-02
Are you enjoying these high quality free contents on a blog without annoying banners? I like doing this for free, but I also have costs so, if you like these contents and you want to help keeping this website free as it is now, please put your tip in the cup below:
Even a small contribution is always welcome!
so this time:
- at line 6 we define the &tomcat_opts anchor with lines 7 and 8 as contents
- *tomcat_opts alias is applied to both the instances (line 11 and line 15)
- each of the instances is performing overrides (line 12, lines 16-17)
let's parse it with yq:
cat overrides.yml | yq -y .the output is as follows:
- name: Update Tomcat Application Servers
  hosts: apps-ci-up3a
  vars:
    defaults:
      options:
        opts: -Xms1G -Xmx2G
        catalina_home: /opt/tomcat
    tomcat01:
      options:
        opts: -Xms1G -Xmx2G
        catalina_home: /opt/tomcat
        catalina_base: /opt/tomcat/instance-01
    tomcat02:
      options:
        opts: -Xms2G -Xmx2G
        catalina_home: /opt/tomcat
        catalina_base: /opt/tomcat/instance-02
Using YAML TAGS
We already saw what YAML tags are, so now let's see then in action using Python and PyYAML library - just create "tags.yml" file with the following contents:
name: Update Tomcat Application Servers
hosts: apps-ci-up3a
defaults: &defaults
  catalina_home: /opt/tomcat
vars:
  - !Instance
    name: instance01
    options:
      <<: *defaults
      opts: -Xms1G -Xmx2G
      catalina_base: /opt/tomcat/instance01
  - !Instance
    name: instance02
    options:
      <<: *defaults
      opts: -Xms2G -Xmx2G
      catalina_base: /opt/tomcat/instance02
Remember that tags are only used to "clarify" types: here we defined two nodes of !Instance type (line 6 and line 12).
Let's parse it with yq to see how this YAML gets interpreted:
cat tags.yml | yq -y .the output is as follows:
hosts: apps-ci-up3a
defaults:
  catalina_home: /opt/tomcat
vars:
  - name: instance01
    options:
      catalina_home: /opt/tomcat
      opts: -Xms1G -Xmx2G
      catalina_base: /opt/tomcat/instance01
  - name: instance02
    options:
      catalina_home: /opt/tomcat
      opts: -Xms2G -Xmx2G
      catalina_base: /opt/tomcat/instance02
as you can see, aliases get expanded using the value of the anchor, and tags simply "disappear".
But they are still there: we can use them to easily convert types into code indeed: create the "tags.py" file with the following contents:
#!/usr/bin/env python3
import yaml

class Instance:
    """Instance class."""
    def __init__(self, name, options):
        self._name, self._options = name, options

    @property
    def name(self):
        return self._name;

    @property
    def options(self):
        return self._options;

def instance_constructor(loader: yaml.SafeLoader, node: yaml.nodes.MappingNode) -> Instance:
    """Construct an instance."""
    return Instance(**loader.construct_mapping(node))

def get_loader():
    """Add constructors to PyYAML loader."""
    loader = yaml.SafeLoader
    loader.add_constructor("!Instance", instance_constructor)
    return loader

instances=yaml.load(open("tags.yml", "rb"), Loader=get_loader())

print("Instances:")
for instance in instances['vars']:
    print(instance.options)
let's discuss the code:
- line 24 maps the "instance_constructor" function to the "!Instance" YAML tag: this means that each time a node with !Instance tag is found, this function is called to process it
- the "instance_constructor" function returns a new instance of the "Instance" class (line19).
- it iterates the "vars" node and prints the "options" of each item (lines 30-31).
Let's assign the execute permission to it and have a go:
chmod 755 tags.py
./tags.py
the output is as follows:
Instances:
{'catalina_home': '/opt/tomcat', 'opts': '-Xms1G -Xmx2G', 'catalina_base': '/opt/tomcat/instance01'}
{'catalina_home': '/opt/tomcat', 'opts': '-Xms2G -Xmx2G', 'catalina_base': '/opt/tomcat/instance02'}
as you see from it, the outcome of loading the YAML is actually the creation of two instances of the Instance class.
Beyond Document Formats: Building the DevOps and DevSecOps Foundations
Successfully implementing relational mapping overrides, compiling custom type constructors via PyYAML, and querying multi-tier keys via command-line wrappers are top-tier operational achievements. Yet, organizing standalone configuration nodes represents just one single technical brick in the massive wall of modern DevOps and DevSecOps engineering on Linux. In complex enterprise networks, an expert cannot operate within isolated dictionary files: you must know how to translate your serialization engineering into advanced shell automation architectures, low-level kernel protection lines, automated compliance checks, and cloud-native CD pipelines without vendor lock-in.
When you evaluate your daily deployment and architecture tasks, are you completely confident you master the holistic engineering layer running under the hood of your automation manifests? Or do you feel you have technical gaps holding your infrastructure designs back?
My book, "DevSecOps and DevOps for Linux: The Foundations", published by Apress, was specifically designed as a comprehensive, lab-driven blueprint to bridge these exact domains. This very tutorial on YAML syntax serves as a direct excerpt and practical foundation for the advanced structured data parsing (XML, JSON, YAML) using Python, jq, and yq, alongside the enterprise GitOps automation workflows engineered inside the volume. Through intensive, hands-on exercises built entirely on open-source, cloud-agnostic architectures, you will discover how to tie your configuration management repositories, automated compliance engines, and cluster deployments together into a unified, secure infrastructure hosted natively on Kubernetes.
Key insights covered in this volume:
- The Holistic Skills Set Brick: Bridge technical engineering with team management frameworks. Master
Scrum,Kanban, andLeanmethodologies to design system architectures aligned with real corporate workflows. - The Shell Scripting & Unix Tools Brick: Build rigorous operational foundations. Master advanced
Bashshell scripting architecture while learning how to combine core Unix tools into robust, repeatable, and enterprise-ready host automations. - The Version Control Engineering Brick: Move past basic commits. Dive deep into
Gitversion control, mastering feature-branch workflows, repository lifecycle management, and complex conflict resolution. - The Data & Core Automation Brick: Build bulletproof data processing setups. Learn advanced
RegEx, how to operate using evergreen tools such asGrep,Sed, andAWK, and how to master structured data parsing (XML,JSON,YAML) usingPythonand tools likexmlstarlet,jq, andyq. - The Modern Python & Automation Brick: Develop a modern Python project using
pyproject.tomlwithpytest-based unit tests, governing the project withGNU Makefor testing, building, and digitally signingRPMpackages. The project is presented in an evolving fashion, showing how features are added step by step, highlighting how a properly structured Python project can be improved and evolved with minimal or no rework at all. - The Linux OS Hardening & PKI Brick: Learn the real mechanics of security. Implement
X.509/PKIarchitectures,TLSconfigurations, andGPGencryption and signing, while mastering low-level kernel defenses likeSELinuxandLinux Capabilities. - The Compliance Check and Shift-Left Security Brick: Learn how to leverage the
pre-commitframework to automate compliance checks withPylintandFlake8, and perform security scans withBanditandSafety, extending the security audit to the full software supply chain. - The Application Integration Brick: Master the foundational protocols used to securely interconnect enterprise microservices, including
HTTP,REST,OpenAPI,SOAP, andLDAP/LDAPS. - The Infrastructure Delivery Brick: Put theory into practice with vertical, real-world labs. Move from basic scripts to engineering
Ansiblearchitectures, rootlessPodmansetups, image creation viaBuildah, and completePulp3deployments usingDocker Compose. - The Enterprise GitOps Pipeline Brick: Tie everything together by automating your software supply chain. Build complete continuous deployment workflows using
Gitea CIpipelines hosted natively onKubernetes(RKE2).
Footnotes
Here it ends our quick tour of the amazing world of YAML: instead of limiting to show only the grammar, I preferred to leverage on yq and Python to show you things in action. However, be wary that although we saw how to deal with YAML using yq, when dealing with YAML it is more convenient to avoid writing shell scripts and instead use other scripting languages that can natively handle it, such as Python.
In my opinion yq is a powerful tool, but I use it only to perform ad-hoc commands or to add YAML support to scripts that maybe is not worth the effort to rewrite into another language.
By the way, this post is part of a trilogy of posts dedicated to markup and serialization formats, so be sure not to miss

Josh B says:
Great write up, thank you.
Marco Antonio Carcano says:
Glad to see you enjoyed it Josh