X Window System is a legacy (1984) windowing system, that is a system providing the basic framework for a GUI environment initially developed as part of Project Athena at MIT. The currently available X protocol version is 11 (dated 1987!) - hence often people refer to X Window as "X11''.
It is really time I wanted to write a few posts on this amazing software that really made the story of IT on the UNIX and Linux platforms: it is one of my favorite software ever, it was really impressive in those years being able to run an application on a host while being able to just render on a remote display.
In the X window - remote display manager (XDMCP) and thin clients we see how to reproduce on a modern Linux distribution a very common setup of the late '80 and early '90: a remote server running applications rendered on X Window based thin clients.
Overview
An X Window thin client is a system with a very minimal installation running just the X Window display server: this was a quite common setup years ago, and there even existed hardware terminals providing a minimal system with screen, keyboard and mouse running just the X Server.
They were used to refer to these thin clients as X-Terminal (not to be confused with the X-Term, that instead is just an application): an example of such an hardware was the NCD-88k.
In a typical thin client setup, right after starting the X Server, the client query the Display Manager service on a remote host: once connected they start the X Window login application waiting for the user to interactively login.
The Lab
In this post we set up a very small lab with an applications server used by X Window thin clients to connect their Display Server: this means that they run every application on the applications server, including the login application.
For sake of simplicity, we configure just one thin client, but you can replicate its setup to configure as many thin clients as you need.
This is the list of the machines in the Lab:
this is the application server and the VPN server endpoint. Since the VPN requires signed certificates, we configure a PKI on it (only because it is a lab - in real life scenarios PKI must have dedicated, secured and with restricted access servers!). We manage the certificates using Easy RSA, while the VPN software is OpenVPN. The attachment process of the remote Display Servers is instead managed using XDMCP: for that reason we install the LightDM Display Manager, along with the very minimum packages set necessary to run the Desktop.
this is the thin client prototype - here we install a very minimal system, configuring graphical login at boot to directly access connect to the Display Manager running on the "app-ca-ut1a001" host - this means that the remote login application you see at login time is directly running on the "app-ca-ut1a001" server itself
Remote Application Server
We start working on this lab by configuring the remote application server "app-ca-ut1a001".
Update The System
As by required by the best practices, we must update the Linux distribution first:
dnf update -ywhen the update process finishes, reboot the system:
shutdown -r nowEnable The EPEL Repository
Since some of the software we are about to install is available through the EPEL repository, before going on we have to enable the EPEL repository as follows:
dnf install -y epel-releaseInstall EasyRSA
Install Easy RSA using dnf:
dnf install -y easy-rsathen initialize it as follows:
/usr/share/easy-rsa/3.1.6/easyrsa init-pkiSetup The Mock PKI
Configure a mock PKI using Easy RSA by typing the following statement:
/usr/share/easy-rsa/3.1.6/easyrsa build-cayou must assign a name to the mock PKI - in this example it is "Carcano TEST CA": just type the name you chose when prompted.
If you enter '.', the field will be left blank.
-----
Common Name (eg: your user, host, or server name) [Easy-RSA CA]:Carcano TEST CA

Notice
------
CA creation complete. Your new CA certificate is at:
* /root/pki/ca.crt
As you see from the above snippet, the outcome is the creation of the CA's certificate "/root/pki/ca.crt".
Install OpenVPN
It is now time to install OpenVPN - just type:
dnf install -y openvpnSince this is the OpenVPN server, we also need to add the necessary firewall exceptions to let connect the OpenVPN clients run by the X Window Thin Client:
firewall-cmd --permanent --add-service=openvpn
firewall-cmd --permanent --add-port=1194/udp
firewall-cmd --reload
Configure OpenVPN As Server
We are finally ready to configure OpenVPN as a server.
Setup The Trusted CA's Certificate
The very first thing to do is copying the mock CA's certificate to the "/etc/openvpn/server" directory - OpenVPN uses that file as the trust store file.
cp /root/pki/ca.crt /etc/openvpn/serverGenerate The Server's Certificate
It is then necessary to generate the private key and Certificate Signing Request (CSR) to submit to the mock CA for getting the server certificate used by the OpenVPN Server issued.
Just type:
/usr/share/easy-rsa/3.1.6/easyrsa gen-req app-ca-ut1a001 nopasswhen prompted, specify the application server's FQDN ("app-ca-ut1a001.netdevs.carcano.local" in this example):
-----
Common Name (eg: your user, host, or server name) [app-ca-ut1a001]:app-ca-ut1a001.netdevs.carcano.local

Notice
------
Private-Key and Public-Certificate-Request files created.
Your files are:
* req: /root/pki/reqs/app-ca-ut1a001.req
* key: /root/pki/private/app-ca-ut1a001.key
the outcome are the private key "/root/pki/private/app-ca-ut1a001.key" and the "/root/pki/reqs/app-ca-ut1a001.req" CSR files: the last one is the one to submit to the Certificate Authority to get back the signed certificate.
In the meantime, let's copy the private key to the "/etc/openvpn/server" directory:
cp /root/pki/private/app-ca-ut1a001.key /etc/openvpn/serverusing the mock CA, we now sign the CSR to generate the TLS-server certificate used by the OpenVPN Server:
/usr/share/easy-rsa/3.1.6/easyrsa sign-req server app-ca-ut1a001confirm the subject's DN by typing "yes", and when requested for the password, type the password you used when creating the mock Certificate Authority.
We can now copy the issued certificate ("/root/pki/issued/app-ca-ut1a001.crt") to the "/etc/openvpn/server" directory:
cp /root/pki/issued/app-ca-ut1a001.crt /etc/openvpn/serverTo proceed with the OpenVPN server setup, it is now necessary to generate the Diffie-Helmann key:
/usr/share/easy-rsa/3.1.6/easyrsa gen-dhonce generated, copy it to the "/etc/openvpn/server" directory as follows, renaming the file into "dh2048.pem":
cp /root/pki/dh.pem /etc/openvpn/server/dh2048.pemlastly, generate the TLS-auth key:
openvpn --genkey tls-auth /etc/openvpn/server/ta.keyNow we have all the cryptographic objects necessary to set up the OpenVPN server.
Configure The OpenVPN Server
The most convenient way for configuring OpenVPN as a server is copying the "server.conf" template file from the "/usr/share/doc/openvpn/sample/sample-config-files" directory to the "/etc/openvpn/server" directory:
cp /usr/share/doc/openvpn/sample/sample-config-files/server.conf /etc/openvpn/serverby doing this we can just focus on configuring only the following directives of the "/etc/openvpn/server/server.conf" file:
- user nobody
- group nogroup
- tls-auth ta.key
- cipher AES-256-CBC
- auth SHA256
- dh dh2048.pem
- cert app-ca-ut1a001.crt
- key app-ca-ut1a001.key
uncomment / modify the original entries in the "server.conf" file as necessary, or add them if they are missing.
When finished with configuring the file,start the OpenVPN service as server and enable it to start at boot:
systemctl enable --now openvpn-server@serverjust to be sure, check also the status of the service:
systemctl status openvpn-server@serverSetup The Display Manager
Now that the OpenVPN tunnel is up and running, we can focus on installing and configuring the Display Manager.
Install The LightDM's PreRequisite RPM Packages
Although probably the most used Display Manager on Red Hat's platforms is GDM, we cannot use it in this scenario: for performance reasons it makes direct access to the graphical hardware, but this seems not to play nice when using Display Servers through a remote Display Manager.
LightDM is probably the Display Manager more suitable for this use case, so we install and configure it - since it has a dependency on the "gnome-shell" RPM package (undeclared in the "lightdm" RPM package by the way), it is mandatory to install the "gdm" RPM package first:
dnf install -y gdmthen it is necessary to configure the system to boot in graphical mode:
systemctl set-default graphicalSince we are not using "gdm", we must also disable it from starting at boot and mask the service:
systemctl disable gdm
systemctl mask gdm
Install And Configure The Display Manager
We are now ready to install LightDM:
dnf install -y lightdmTo enable the registration of Display servers into the Display Manager, it is necessary to configure LightDM to listen for incoming queries - modify the "/etc/lightdm/lightdm.conf" configuration file, setting "enabled=true" in the "[XDMCPServer]" stanza:
[XDMCPServer]
enabled=true
we must also add a firewall exception to enable incoming connections to the Display Manager's XDMCP endpoint.
First we need to guess the subnet of the OpenVPN protected traffic: the subnet is defined by the "server" directive in the "/etc/openvpn/server/server.conf" file.
We ca easily get it by running:
grep '^[ ]*server ' /etc/openvpn/server/server.conf on my system the output is:
server 10.8.0.0 255.255.255.0that in CIDR notation is "10.8.0.0/24".
We can now configure the firewall exception only for traffic of the "10.8.0.0/24" subnet:
firewall-cmd --permanent --add-service=xdmcp
firewall-cmd --permanent --add-rich-rule='rule family=ipv4 source address=10.8.0.0/24 service name=xdmcp accept'
firewall-cmd --reload
it is also mandatory to set up polkit to grant every user access to the "color-manager" - create the "/etc/polkit-1/localauthority/50-local.d/45-allow-colord.pkla" policy file with the following contents:
[Allow Colord all Users]
Identity=unix-user:*
Action=org.freedesktop.color-manager.create-device;org.freedesktop.color-manager.create-profile;org.freedesktop.color-manager.delete-device;org.freedesktop.color-manager.delete-profile;org.freedesktop.color-manager.modify-device;org.freedesktop.color-manager.modify-profile
ResultAny=no
ResultInactive=no
ResultActive=yes
Lastly it is mandatory to define the default X Window session to use (otherwise it will be asked every time right after the login): since we have the GNOME environment available (it is brought by the "gdm" package we installed as prerequisite for LightDM), we can configure "gnome" as the default session for every user.
To do so, copy the stock "/usr/share/accountsservice/user-templates/standard" as follows:
cp /usr/share/accountsservice/user-templates/standard /etc/accountsservice/user-templates/standard
Add "XSession=gnome" to the "[User]" stanza of the "/etc/accountsservice/user-templates/standard" file as follows:
[User]
Session=gnome
XSession=gnome
Icon=${HOME}/.face
The "/etc/accountsservice/user-templates/standard" file is used to generate at the first login time the user specific settings files beneath the "/var/lib/AccountsService/users" directory.
Configure The Slick Greeter
The cherry on the top is certainly customizing the login application layout: to achieve this, first we install the "slick" greeter:
dnf install -y slick-greeterthen, configure "lightdm" to use "slick" as the greeter.
This is accomplished by configuring the following statements to the "[Seat:*]" stanza in the "/etc/lightdm/lightdm.conf" file:
greeter-session=slick-greeter
We can now customize the "slick" greeter by editing the "/etc/lightdm/slick-greeter.conf" file at wish:
background=/usr/share/backgrounds/grimoire.jpg
draw-user-backgrounds=false
the above example sets the "/usr/share/backgrounds/grimoire.jpg" file as background.
Enable The LightDM Display Manager At Boot
We can now enable "lightdm" to start at boot:
systemctl enable lightdmand restart the system to have a go with all this stuff:
shutdown -r nowThin Client
We can now focus on the installation and configuration of the thin client prototype "wks-ca-ut1a001".
Update The System
As by required by the best practices, we must update the Linux distribution first:
dnf update -ywhen the update process finishes, reboot the system:
shutdown -r nowEnable The EPEL Repository
Since some of the software we are about to install is available through the EPEL repository, before going on we have to enable the EPEL repository as follows:
dnf install -y epel-releaseInstall EasyRSA
Since we are managing certificates using Easy RSA, we need to install it on the client too:
dnf install -y easy-rsaonce installed, as we already saw we must initialize it as follows:
/usr/share/easy-rsa/3.1.6/easyrsa init-pkiInstall OpenVPN
It is now time to install OpenVPN:
dnf install -y openvpnConfigure OpenVPN As Client
This time we must configure OpenVPN as a client: the thin client must directly connect to the Application Server using the VPN, so that the X Window traffic is protected by eavesdropping.
So we are now configuring OpenVPN to connect to the "app-ca-ut1a001" server.
Setup The Trusted CA's Certificate ANd TA
Since it is also the PKI server, login to the "app-ca-ut1a001" and copy the Certificate Authority's certificate to the "/tmp" directory of the "wks-ca-ut1a001" thin client as follows:
scp /root/pki/ca.crt vagrant@wks-ca-ut1a001:/tmp
then do the same for the OpenVPN's TLS-Auth file:
scp /etc/openvpn/server/ta.key vagrant@wks-ca-ut1a001:/tmp
then, on the "wks-ca-ut1a001" host, move both files to the "/etc/openvpn/client" directory:
mv /tmp/ca.crt /etc/openvpn/client
mv /tmp/ta.key /etc/openvpn/client
Generate The Client's Certificate
We are now ready to genete the OpenVPN "wks-ca-ut1a001" client's certificate.
Log in to the "wks-ca-ut1a001" machine and type:
/usr/share/easy-rsa/3.1.6/easyrsa gen-req wks-ca-ut1a001 nopasswhen prompted, specify the application server's FQDN ("wks-ca-ut1a001.netdev.carcano.local").
copy the private key to the "/etc/openvpn/client" directory:
cp /root/pki/private/wks-ca-ut1a001.key /etc/openvpn/clientthen, since the mock PKI is on the "app-ca-ut1a001" server, we must copy the CSR to that machine to have it signed by the Certificate Authority:
scp /root/pki/reqs/wks-ca-ut1a001.req vagrant@app-ca-ut1a001:/tmplog in to the "app-ca-ut1a001" machine and import the CSR as follows:
/usr/share/easy-rsa/3.1.6/easyrsa import-req /tmp/wks-ca-ut1a001.req wks-ca-ut1a001and then sign the "wks-ca-ut1a001" CSR to generate a client certificate:
/usr/share/easy-rsa/3.1.6/easyrsa sign-req client wks-ca-ut1a001The outcome is the "/root/pki/issued/wks-ca-ut1a001.crt" certificate: copy it to the "wks-ca-ut1a001" machine:
scp /root/pki/issued/wks-ca-ut1a001.crt vagrant@wks-ca-ut1a001:/tmp
Login back to the "wks-ca-ut1a001" machine and move the signed certificate to the "/etc/openvpn/client" directory:
mv /tmp/wks-ca-ut1a001.crt /etc/openvpn/client
Now we have all the cryptographic objects necessary to set up the OpenVPN client.
Configure The OpenVPN Client
The most convenient way for configuring OpenVPN as a client is copying the "client.conf" template file from the "/usr/share/doc/openvpn/sample/sample-config-files" directory to the "/etc/openvpn/client" directory:
cp /usr/share/doc/openvpn/sample/sample-config-files/client.conf /etc/openvpn/client/app-ca-ut1a001.conf Doing this way we just need to edit the following directives of the "/etc/openvpn/client/app-ca-ut1a001.conf" file:
- user nobody
- group nogroup
- remote app-ca-ut1a001.netdevs.carcano.local 1194
- tls-auth ta.key
- cipher AES-256-CBC
- auth SHA256
- key-direction 1
- cert wks-ca-ut1a001.crt
- key wks-ca-ut1a001.key
Uncomment / modify the original entries in the file as necessary, or add them if they are missing.
Add A Custom SeLinux Policy For The OpenVPN Client Service
The OpenVPN client service requires some capabilities that are not granted by default, so we need to grant them through a custom Selinux policy.
First, create the "/tmp/openvpnlocal.te" file with the following contents:
module openvpnlocal 1.0;

require {
	type init_t;
	type user_tmp_t;
	type openvpn_t;
	type NetworkManager_dispatcher_chronyc_t;
	class dir write;
	class file open;
	class capability { dac_override dac_read_search };
}

#============= NetworkManager_dispatcher_chronyc_t ==============
allow NetworkManager_dispatcher_chronyc_t self:capability { dac_override dac_read_search };

#============= init_t ==============
allow init_t self:dir write;

#============= openvpn_t ==============
allow openvpn_t user_tmp_t:file open;
then, generate and compile the "openvpnlocal" Selinux policy module as follow:
checkmodule -M -m -o /tmp/openvpnlocal.mod /tmp/openvpnlocal.te
semodule_package -o /tmp/openvpnlocal.pp -m /tmp/openvpnlocal.mod
Now that the module is ready, just install it as follows:
semodule -i /tmp/openvpnlocal.ppWe can now safely start the OpenVPN service as client loading the settings to connect to the "app-ca-ut1a001" server and enable it to start at boot:
systemctl enable --now openvpn-client@app-ca-ut1a001.servicejust to be sure, check also the status of the service:
systemctl status openvpn-client@app-ca-ut1a001.serviceInstall And Setup The Display Server
We are now ready for installing and setting up the X Window Display Server.
Install The Server With GUI RPM Group
On the "wks-ca-ut1a001" host, install the "Server with GUI" package group:
dnf group install -y "base-x"then restart the system:
shutdown -r nowConfigure The Display Server's Firewall Exception
It is of course mandatory to configure a firewall exception to allow incoming connections from the Display Manager running on "app-ca-ut1a001" host to the Display server running on this thin client.
Since the "x-display" Firewalld service does not exist, we must create it as follows:
firewall-cmd --permanent --new-service=x-display
firewall-cmd --permanent --service=x-display --set-description="allow connection to Displays"
firewall-offline-cmd --service=x-display --add-port=6000-6009/tcp
we must then add the firewall service, limiting access only from the "app-ca-ut1a001" IP address on the OpenVPN tunnel ("10.8.0.1", since the subnet as we saw is "10.8.0.0/24"):
firewall-cmd --permanent --add-rich-rule='rule family=ipv4 source address=10.8.0.1/32 service name=x-display accept'
firewall-cmd --reload
Start X One Shot And Connect To The Remote Display Manager
We can now test the set up by interactively logging in to the thin client "wks-ca-ut1a001" console and manually launch and X Server, setting it up to use the Display 7, connecting it to the remote Display Manager running on the "app-ca-ut1a001" server:
X :7 -query 10.8.0.1 -onceIf everything is properly running, the X-Window Login Application running on the "app-ca-ut1a001" server will be shown in a few seconds on our screen.
The outcome on my system is as by the below picture:

As you see, the custom background is shown as expected.
Configure Automatic Connect To The Remote Display Manager at Boot
What we did so far is nice, but we are still missing the most important feature: the Thin Client must boot in graphical mode, automatically query the Display Manager running on the "app-ca-ut1a001" server to register its Display Server and start the X Window Login application.
To do so, we replace the "gdm" service with a custom "x11-thinclient" service, automatically starting it at boot time.
First, create the "/etc/sysconfig/x11-thinclient" settings file:
XDMCP_SERVER=10.8.0.1we can now create the "/usr/lib/systemd/system/x11-thinclient.service" Systemd Unit file with the following contents:
[Unit]
Description=X11 Remote Thin Client

Conflicts=getty@tty1.service
After=getty@tty1.service

Conflicts=plymouth-quit.service
After=plymouth-quit.service

After=rc-local.service plymouth-start.service systemd-user-sessions.service

OnFailure=plymouth-quit.service

[Service]
Type=simple
ExecStart=/usr/bin/X :1 -query ${XDMCP_SERVER} -once
KillMode=mixed
Restart=always
IgnoreSIGPIPE=no
BusName=org.gnome.DisplayManager
EnvironmentFile=-/etc/locale.conf
EnvironmentFile=-/etc/sysconfig/x11-thinclient
ExecReload=/bin/kill -SIGHUP $MAINPID
KeyringMode=shared

[Install]
Alias=display-manager.service
and of course reload systemd
systemctl daemon-reload we are done: enable the "x11-thinclient" service to start at boot time:
systemctl enable x11-thinclient.serviceand of course configure the system to boot in graphical mode:
systemctl set-default graphicalto have a go, just restwart the system:
shutdown -r nowPublishing Applications On The application Server
It has finally come the time for having a go with everything, ... first, on the application server "app-ca-ut1a001" we install the most famous and used X Window application, ... the "xterm".
dnf install -y xtermThen, interactively log in to the workstation "wks-ca-ut1a001" console as a normal user.
Once logged in, click on the grid on the middle bottom of the desktop - if you mouse hover on it it displays the "Show Applications" hint - if you don't see it, first click on the "Activities" button on the top left of the Desktop.
Now, from the displayed applications, launch the xterm we just installed.
Install Nautilus
The xterm is certainly handy for operating on the application server, but we are still missing every application.
For example, we are still missing a File Manager application (the point and click app used for browsing files and folders and opening/running files).
The official GNOME file manager is called GNOME Files - it replaced the old Midnight Commander in GNOME 1.4, becoming the default File Manager since GNOME 2.0.
Since it is formerly and internally known as Nautilus, also the RPM package providing it is called "nautilus".
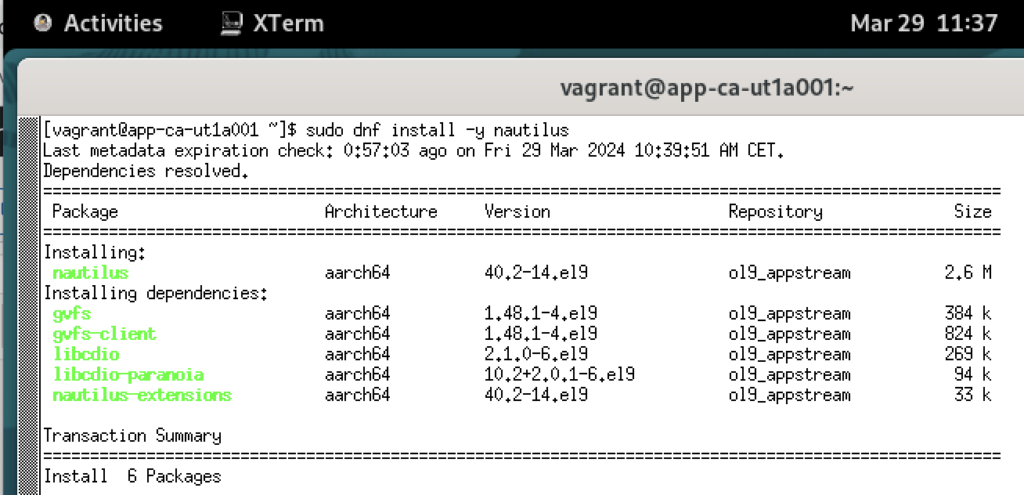
Since we already opened an xterm , we can just use that terminal and install it as shown in the box.
After installing it, it becomes available in the Dock, at the bottom of the screen:

Install The Basic Applications
Same way as we did with Nautilus (using the xterm open window), it is certainly worth the effort to install the following applications:
In this post we set up a lab with the following machines:
It is the GNOME official application to manage, install and remove software packages
dnf install -y gnome-softwareIt is the help browser for the GNOME desktop: it was designed to be capable of browsing all the documentation on the system in one central tool, including traditional man pages, info pages and documentation written in DocBook.
dnf install -y yelpIt is a powerful graphical calculator with financial, logical and scientific modes. It uses a multiple precision package to do its arithmetic to give a high degree of accuracy.
dnf install -y gnome-calculatorIt is a small, but powerful text editor designed specifically for the GNOME desktop. It has most standard text editor functions and fully
supports international text in Unicode. Advanced features include syntax highlighting and automatic indentation of source code, printing and editing of multiple documents in one window. It is extensible through a plugin system, which currently includes
support for spell checking, comparing files, viewing CVS ChangeLogs, and adjusting indentation levels. Further plugins can be found in the
"gedit-plugins" package.
dnf install -y geditIt is an open-source web browser, designed for standards compliance, performance and portability.
dnf install -y firefoxIt is a terminal emulator for GNOME. It features the ability to use multiple terminals in a single window (tabs) and profiles support.
dnf install -y gnome-terminalIt is a simple multi-page document viewer. It can display and print Portable Document Format (PDF), PostScript (PS) and Encapsulated PostScript (EPS) files. When supported by the document format, evince allows searching for text, copying text to the clipboard, hypertext navigation, table-of-contents bookmarks and editing of forms. Support for other document formats such as DVI and DJVU can be added by installing additional backends.
dnf install -y evinceIt is an utility for previewing fonts and displaying information about a specified font: it displays the name, style, type, size, version and copyright of the font.
dnf install -y gnome-font-viewerIt is a simple utility application to find and insert unusual characters.
dnf install -y gnome-charactersInstall GNOME Classic
The "modern" GNOME session may not be handy for every user, so it is certainly kind to give them the possibility to choose between the "modern" GNOME session and the "classic" GNOME session.
To do that, on the "app-ca-ut1a001" host, install the "gnome-classic-sessions" RPM packages as follows:
dnf install -y gnome-classic-sessionThe available X Window session are the ".desktop" files available beneath the "/usr/share/xsessions" directory:
ls -1 /usr/share/xsessionson my machine they are as follows:
gnome-classic.desktop
gnome-classic-xorg.desktop
gnome-custom-session.desktop
gnome.desktop
gnome-xorg.desktop
You can now assign a custom X Window session on a per user basis by modifying the user's specific setting file beneath the "/var/lib/AccountsService/users" directory.
For example, if you want to provide the GNOME classic X Session, set the "XSession" and "Session" keys in the "[User]" stanza to "gnome-classic".
Real Life Scenario
if you are among my affectionate readers you know that all of my blog posts are practical an with some kind of real life scenario.
In this post the playground is simulating a user desktop for Python developers using PyCharm.
As you can easily guess, the software must be installed on the "app-ca-ut1a001" host. since the Thin Client "wks-ca-ut1a001" is just the Display Server.
Let's start by installing PyCharm's prerequisites: Git and JRE:
dnf install -y jre gitWith the Firefox browser we just installed, download JetBrain's PyCharm Community Edition (Pycharm CE) from https://www.jetbrains.com/pycharm/download.
The downloaded file is a gzipped tarball: we must extract it beneath the "/usr/local" directory.
tar xfvz ~/Downloads/pycharm-community-2023.3.5-aarch64.tar.gzsudo mvpycharm-community-2023.3.5/usr/local/
For easily switching among versions, let's create also the following symlinks:
ln -s /usr/local/pycharm-community-2023.3.5 /usr/local/pycharm-community
ln -s /usr/local/pycharm-community/bin/pycharm.sh /usr/bin/pycharm
Are you enjoying these high quality free contents on a blog without annoying banners? I like doing this for free, but I also have costs so, if you like these contents and you want to help keeping this website free as it is now, please put your tip in the cup below:
Even a small contribution is always welcome!
We are now ready to publish the application: this is done by creating the "/usr/share/applications/pycharm-ce.desktop" file with the following contents:
[Desktop Entry]
Name[it]=PyCharm CE
Name=PyCharm CE
Comment[it]=Full featured Python IDE
Comment=View Full featured Python IDE
Keywords[it]=pyhton;py;ide
Keywords=pyhton;py;ide
TryExec=/usr/bin/pycharm
Exec=/usr/bin/pycharm %U
StartupNotify=true
Terminal=false
Type=Application
Icon=/usr/local/pycharm-community/bin/pycharm.png
Categories=Deveopment
MimeType=application/x-python-code:text/x-python
Since we put the "pycharm-ce.desktop" file in the "/usr/share/applications" directory, the "PyCharm CE" application is now available in the Applications Launcher (the "Show Applications") for every user.
Footnotes
Here it ends the X window - remote display manager (XDMCP) and thin clients post - I hope you enjoyed it: I wrote it as a tribute to what I think is one of the software that made the story of the UNIX family, and that despite quite old, if properly secured, can still be used in specific scenarios.
It seems they want to replace X Window with Wayland - I have nothing against Wayland, but it seems to me they forgot the X Terminal Thin Clients use case: maybe it is not something for the majority of the people, but I'm sure that by breaking the support of XDMCP without a substitute we are not only missing a great feature, but in this specific case, we are pretending to replace X Window without the feature that made it for long time unique.
So, by my side, welcome Wayland for the brought protocol improvement: but to me it looks still half made, since without the XDMCP support (or even better an improved substitute), it is not the X Window replacement they are saying it to be.

Lisa Gill says:
Thanks, I have recently been looking for info about this subject for a while and yours is the greatest I have discovered so far. However, what in regards to the bottom line? Are you certain in regards to the supply?
Marco Antonio Carcano says:
Hi Lisa, sadly it seems to me they just designed it pretending XDMCP never existed – look for example to this thread on SDDM https://github.com/sddm/sddm/issues/1069 – just quoting them “XDMCP is not relevant to most users and it’s unsecure”. This sentence is just false: it is not true that it is not relevant to most users and despite it is unsecure it can be easily secured nowadays, especially if you are improving it. This answer just reflects their own vision, or probably it is just an excuse to not to admit they have not thought to it since the very beginning and so probably now it is too late for fixing things – yes this seems another big hit of “properly” implementing the “Agile” way. So, the short answer is sadly “yes, because they just don’t care”